How to Splice Ropes: Eye Splices and Soft Shackles for Charter Crews
Concrete, crew‑ready instructions for how to splice rope onboard: three‑strand and double‑braid eye splices, plus Brummel soft shackles in Dyneema and reliable finishing methods.

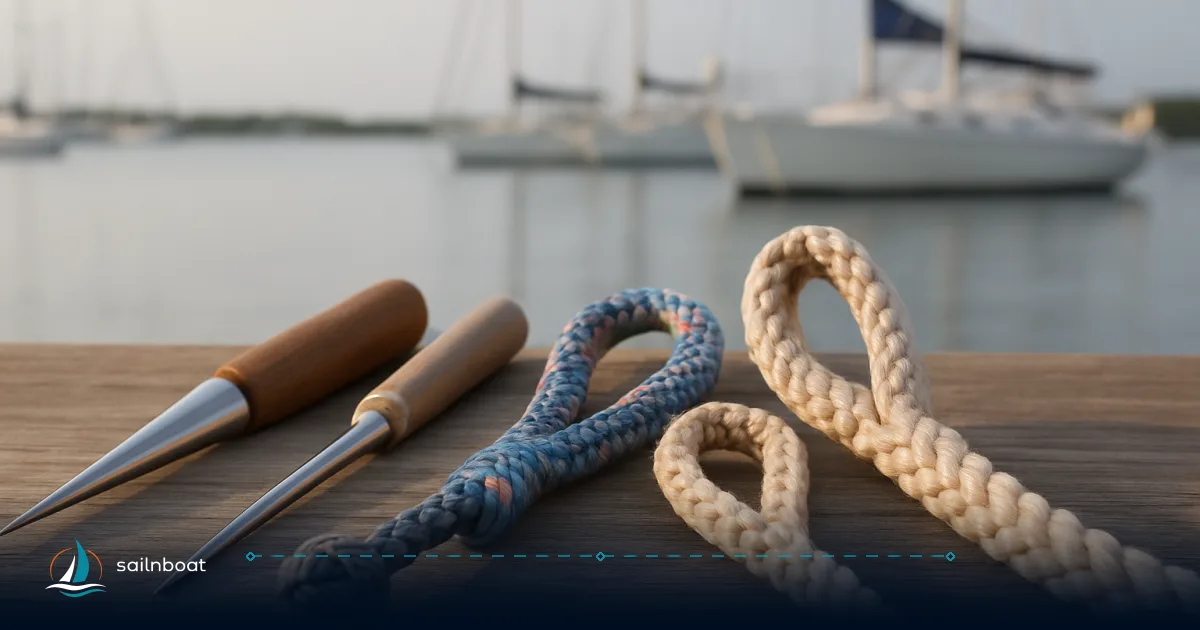
You can reliably splice most lines onboard if you use the correct tool and method for the rope type: for three‑strand use traditional tucks, for double‑braid follow a core/cover bury, and for hollow Dyneema single‑braid use a locked Brummel eye and a diamond‑knot stopper to make a soft shackle.
Essential Tools for Splicing Ropes
Good splicing starts with the right kit. Carry these items in your ditty bag and clean them after saltwater use.
Required Tools
- Swedish (hollow) fid (several sizes). Use for hollow or cover/core braids to pull the tail through the rope; hollow fids speed and simplify buries.
- Marlinspike. Small metal spike for opening strands of three‑strand lines and levering tucks.
- Sharp folding knife with a thin, controllable blade (micro‑serrated for braided spectra/Dyneema helps). Include a spare.
- Tape (electrical or rigging tape). Tape the working tails to stop fray while you work.
- Whipping twine / sailmaker’s needle and waxed thread. For sewn finishes and seizing.
- Pull‑wire or thin stainless hook (for Dyneema/hollow braid tails). Many Dyneema splicing kits include a pull wire.
- Heat‑shrink tubing and heat source (only for compatible covers — do not use heat on high‑modulus fibres like raw Dyneema cores).
- Work gloves, marker pen, small ruler/fid gauge. Use gloves when pushing fids or pulling tight tucks.
Practical note: a Swedish (tubular) fid is the single most useful purchase for modern braid splicing; a basic marlinspike and a couple of fids in different diameters cover most charter needs.
Performing Eye Splices on Three‑Strand Ropes
This is the everyday splice for anchor bridles, mooring lines and utility loops on older three‑strand lines.
Step‑by‑Step Instructions
- Choose eye size and mark it on the standing part; secure the mark with tape to stop movement.
- Unlay the end: unlay a working length that gives you enough tail to complete the tucks — this commonly ranges from roughly 15–40 cm depending on rope diameter (larger ropes need longer unlays). Measure it against rope diameter or use fid‑length guidance if you have a fid.
- Make a small crown knot at the bitter end (optional for neatness) so the working tails sit together.
- Use the marlinspike to open one strand of the standing part and tuck the first working strand through (over‑under pattern following the lay). Pull snug. Repeat with the other two strands in order. For synthetic three‑strand you typically make 3–5 full tucks; natural fibres usually need fewer. After full tucks add 1–2 half‑tucks to taper.
- Dress the splice: pull each tuck tight, milk the rope so the splice sits smooth, and trim tails progressively shorter to create a taper. If the rope frays, secure the tapered area with whipping or sewn seizing.
Practical checks and safety
- A properly made three‑strand eye has no strands poking out and feels smooth along the transition. Inspect under load before committing the splice to a critical role.
- Work on a stable surface, tape the standing part to keep the eye size, and cut away from yourself. Gloves protect against slivers and pressure from pulling tucks.
Eye Splicing Double‑Braid Ropes
Double‑braid (cover + core) is common in sheets, halyards and control lines; the splice preserves more strength if you re‑insert core and/or bury cover correctly.
Techniques for Double‑Braid
- Identify cover vs core. For many modern double‑braids the core is load‑bearing; for others the cover contributes — confirm with the rope label or manufacturer.
- Unlay the cover a suitable distance — manufacturers often specify fid‑length bury distances and the sequence of core/covers; for class‑I eye splices you will work to specific numbered stitch patterns. Use the rope maker’s instructions when available.
- Common methods:
- Core‑to‑core bury (for ropes where the core is the load member): expose and tuck the core into the cover of the standing part following the manufacturer’s stitch pattern.
- Cover‑to‑cover bury (when the cover is used to form the eye and the core remains continuous): reinsert the cover and bury: the cover is tapered and stitched into the standing part.
- For double‑braid a correctly buried splice uses multiple fid‑lengths for the bury (some guides cite long buries measured in fid‑length units), and tidy dressing is critical to avoid creep or slippage. If the splice will take shock loads or runs through blocks, consider using a thimble and an appropriately long bury.
Checklist table — quick comparison
| Rope type | Typical splice | Typical unlay/bury guidance | Main finish |
|---|---|---|---|
| Three‑strand laid | Eye splice with 3–5 tucks + tapered half‑tucks | Unlay 15–40 cm (depends on diameter) — use fid‑lengths for large lines. | Tapered tails + whipping/sew |
| Double‑braid (cover/core) | Core‑to‑core or cover bury eye; Class‑I patterns | Bury measured in fid‑lengths; follow manufacturer (often many fid lengths). | Thimble + stitched cover, long bury |
| Dyneema single (hollow) | Brummel (locked) eye; soft shackle construction | Unlay to make interlock and bury; bury lengths given in multiples of rope diameter by manufacturer. | Diamond knot or sewn button stopper; leave tails |
(Use this table to choose the correct method for the rope you have aboard—do not substitute a three‑strand method on hollow high‑modulus braids.)
Creating Soft Shackles with Dyneema
Soft shackles are lightweight, gentle on sails and widely used where a metal shackle would be over‑spec or noisy. For charter work you will most commonly make them from hollow Dyneema single‑braid (AmSteel/Equivalent).
Brummel Eye Splice Technique
- Cut and prepare line: choose diameter for the intended load (manufacturers provide strength charts). Mark two points for eye size and bury length.
- Make the Brummel interlock: feed sections of the line through each other per the Brummel sequence — the technique interlocks the inner parts so the eye cannot slip back under load. There are “one‑end” and “two‑end” Brummel methods; follow step diagrams in a manufacturer or rigging guide.
- Add a locking tuck: for high‑load uses add an extra locking tuck (often called a locked Brummel) near the bury exit to reduce creep under cyclic loads.
- Form the stopper/button: tie a diamond knot (a compact lanyard knot) or form a sewn button from the same line and leave modest tails. The diamond knot is the common crew‑made button for soft shackles.
- Dress and test: milk the braid so the bury seats, dress the eye to be smooth, and progressively load the shackle in a controlled test (static pull tests onboard, not a single heavy shock) before trusting it for critical work.
Important dyneema points and pitfalls
- Dyneema does not take heat well in its fibres; avoid melting or heavy heat on raw HMPE fibres — prefer mechanical stitches or sewn finishes.
- The stopper knot is often the weak point; leave reasonable tails or back them with a small stitched retainer. Inspect before each use.
- Soft shackles can equal small metal shackles in working load if correctly sized and spliced, but they wear quickly on abrasive fittings — protect contact points with chafe guards.
Finishing Techniques to Prevent Slippage
A good finish prevents the bury from working out, reduces chafe and keeps the splice compact.
Effective Finishing Methods
- Tapering: trim splice tails progressively shorter in stages (cut a bit, dress, then cut again) so the splice tapers into the standing part rather than ending abruptly. This reduces snagging and local stress.
- Whipping / sewn seizing: use whipping twine or a few sewn zig‑zag stitches with coated thread at the start/exit of the bury. This is the most durable, ship‑shape finish for high‑use lines.
- Heat‑shrink tubing: useful on some covers to keep a neat external finish; avoid on high‑strength cores unless the manufacturer explicitly permits heat finish.
- Stitched protective cover: for rodes or sheets that run through blocks, a sewn protective sleeve over the splice throat increases longevity.
Finish notes by rope type
- Three‑strand: taper + whipping with waxed thread.
- Double‑braid: dress the cover, stitch or serve the transition and use a thimble if chafe / pin loading applies.
- Dyneema/hollow: do not rely on melted ends; use sewn finishes, back up the stopper knot, and leave tails per manufacturer guidance.
When to Consult a Professional Rigger
Knowing your limits keeps the crew and boat safe. These are the common triggers to hand the job to a professional:
- Any splice that will carry standing‑rigging loads or serve as a primary anchor/keel attachment — always consult a qualified rigger for structural or mast‑attached splices. Regulatory and employer standards require qualified riggers for critical lifts and structural rigging.
- Wire rope splicing or any splice on metallic (wire/steel) rodes — these require specialist tools and qualifications.
- Large‑diameter rodes where fid‑length bury guidance becomes complex (many manufacturers give different bury lengths for >2" lines).
- When the splice is to be certified or used in commercial operations where inspection records and documented safe working load (SWL) are required.
- If testing shows creep, slipping, or any unusual wear after a test load — get a rigger to inspect and rework.
Practical charter rule: if the splice will hold the anchor rode for overnight heavy weather or be relied on in a tight anchoring situation, either fit a factory‑made thimble splice by a rigger or have your splice inspected by one before you go to sea.
Final checklist & maintenance
- Tools: Swedish fid, marlinspike, knife, tape, whipping twine, pull‑wire, gloves.
- Inspect splices visually before every passage: look for pulled tucks, exposed buries, broken yarns, or crushed stopper knots.
- Load‑test soft shackles and new splices with progressive pulls before using them in service.
- Replace or rework any splice that has crept or shows chafe; a splice that has “walked” out of its bury is not safe for critical loads.
Practice plan for crews
- Start with an inexpensive three‑strand sample line and practice the 3–5 tucks plus taper until you can make a neat, smooth eye in under 30 minutes.
- Move to a double‑braid sample (follow the maker’s splice sheet) and practise inserting a core or burying the cover.
- Finally, practice a Brummel on a short length of hollow Dyneema; the diamond knot takes most crews the most practice. Always keep a certified spare soft shackle for critical stays until you are confident in the result.
You now have the practical roadmap for how to splice on a charter boat: carry the right tools, match the method to the rope, finish the work so it won’t slip, and call a rigger when the load or uncertainty exceeds your confidence. Practice ashore, test under controlled load, and keep a small selection of factory splices for the most critical uses.
Enhance your crew’s skills by practicing these splicing techniques onboard.
Frequently Asked Questions
A Swedish (hollow) fid or set of fids, a marlinspike, sharp knife, tape, whipping twine, a small sewing needle or sailmaker's palm, heat‑shrink or lighter for some synthetic covers, and gloves; choose a hollow fid for modern braided lines and a marlinspike for three‑strand work.
Form the eye, unlay the strands a suitable distance (depends on diameter), tuck each working strand under a standing strand in sequence, repeat 3–5 full tucks then add 2 tapered half‑tucks, pull tight and dress the splice.
The Brummel is a locked eye splice for hollow single‑braid ropes (Dyneema); you interlock sections and bury the tail, making a secure, low‑bulk eye used with a diamond‑knot stopper to form a soft shackle.
Common finishes are tapering the tails (cutting them progressively shorter), whipping/sewing the transition, and using stitched or glued covers; for Dyneema avoid melting — prefer stitched or sewn finishes and leaving modest tails.
Hire a rigger for standing‑rigging, wire work, large‑diameter rodes, any splice carrying the full anchor or mast loads, or when you cannot confidently test and certify the splice yourself.
Written by
Sailnboat Editorial
The Sailnboat editorial desk covers yacht and boat chartering worldwide — routes, bases, seasons, boat types, paperwork and the practical costs that decide a trip. We are a charter marketplace, not a boat owner or a local agency: what we sell is judgement and support, so our guides are written to help you make a decision, not to sell you a specific boat. Every guide is checked against live operator and marina data before it goes out.
Fact-checked against live operator and marina data, and published under our editorial standards. Last reviewed: .