Jacklines and Tethers: Your Guide to Safe Rigging on Deck
Practical, step-by-step guidance for rigging jacklines and tethers on charter yachts: materials, placement, tether lengths, attachment points, quick-connect practice and inspection routines.

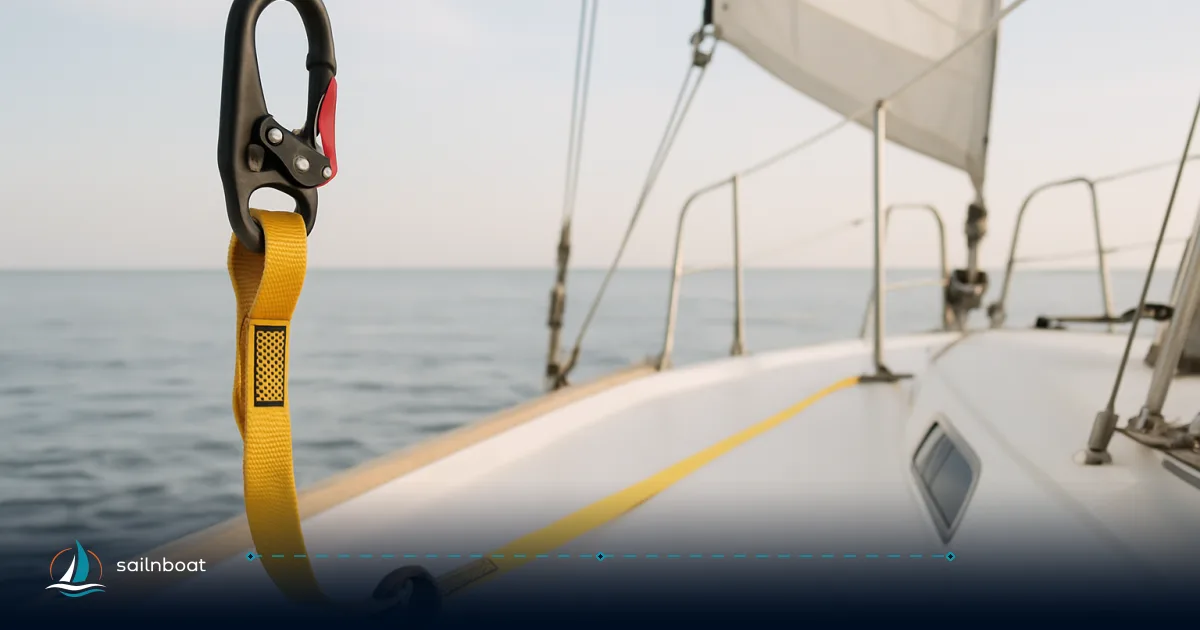
Rig jacklines and tethers so everyone aboard can move on deck clipped‑in: fit flat polyester jacklines close to the centreline, use ISO‑compliant harnesses and tethers with double‑action hooks, and carry a 1 m tether for the cockpit plus a 2 m for the foredeck. Follow a simple quick‑connect routine (clip before you leave the cockpit; double‑clip when stationary), inspect webbing often for UV and chafe, and attach only to properly reinforced padeyes or cleats to keep your crew aboard and recoverable.
Choosing Materials for Jacklines and Tethers
Use materials that trade low stretch and abrasion resistance for predictable behaviour when loaded.
- Jacklines: flat, UV‑resistant polyester webbing is the standard choice for general use—it runs flat underfoot, resists UV better than nylon and has low stretch under load. Typical commercial jacklines are commonly supplied in ~25 mm (1") widths and are sold with sewn loop ends.
- Tethers and harnesses: buy harnesses and tethers that meet ISO 12401 (or equivalent) and carry self‑locking/double‑action hooks at the boat end. Modern tethers often have an integrated overload‑indicator thread and are rated and marked; these features help detect a previous overload. Racing and offshore rules reference ISO standards and require short tethers and self‑locking hooks.
- Hook type: prefer double‑action (two‑hand or two‑motion) snap hooks or properly tested locking hooks at the boat end; single‑action hooks have a history of accidental rotations and failures under eccentric loads. Practical testing has shown some common snap hooks are vulnerable to odd‑angle loading, so choose reputable tether brands.
Trade‑off: UHMWPE (Dyneema/ Spectra) webbing is stronger and lighter and resists water absorption, but it is more expensive and can be stiffer to sew or terminate; many charter bases stick to polyester for its predictable cost and handling.
Correct Placement of Jacklines
Correct placement reduces the chance of a clipped‑in crewmember being pulled off the boat, and keeps tethers from snagging rigging.
Placement guidelines
- Run a pair of jacklines on both sides of the cockpit centreline, preferably inboard and close to the centreline so a clipped crewmember can move along the deck between the cockpit and foredeck without reaching over lifelines. Keep the running position close to the centreline rather than outboard.
- Do not run jacklines all the way to the bow or stern. Terminate jacklines short of the extreme bow and stern—this reduces the risk of someone clipped to the end of the jackline being carried over if they fall off the end. Instead, leave the last section open and rely on short tethers or a dedicated forward padeye.
- Use through‑deck padeyes or purpose‑fitted strongpoints for the terminations; padeyes should be bedded, through‑bolted and backed with a robust reinforcement plate. Many manufacturers and fitting guides recommend strongpoints designed to resist multiple kilonewtons of load.
- Route jacklines away from winches, clutches, blocks and places where repeated reefing or sail handling will rub them. Where they must cross a likely chafe point, protect the jackline with a sleeve or guard (see Chafe Mitigation).
Practical set‑up notes
- Jacklines should lie flat and be neither floppy nor impossibly taut—leave enough tension that the webbing won’t easily roll underfoot but not so much that it lifts hardware or concentrates load on a single stitch.
- Use visible colours (yellow or orange) or retro‑reflective stitching for night work; some commercial kits include reflective stripes.
Determining Tether Lengths and Attachment Points
Choose tether length and attachment points to match the task and minimise immersion risk.
Recommended tether lengths
- Cockpit use: a ~1‑metre tether lets you move around the cockpit and clip to fixed points without creating a long trailing leg. Many charter skippers keep a short 1 m tether for engine checks, boarding and cockpit duties.
- Forward deck work: a 2‑metre tether is appropriate when you must move along the foredeck and clip to jacklines—this size is commonly used offshore, but always keep the tether as short as the task allows. Offshore racing and safety rules commonly limit tethers to 2 m total length; they also require a short‑leg or twin tether solution for some conditions.
Compare tether length and use
| Task | Typical tether length | Why |
|---|---|---|
| Cockpit manoeuvres, harbour work | 1 m | Minimises chance of torso immersion and drag if you go overboard |
| Forward sail handling, anchor work | 2 m | Gives reach along jackline while staying clipped in |
| Offshore/night watches | Twin/two‑leg system (short + long) | Allows quick short‑clip while still having a longer working leg when needed |
Attachment points — where to clip
- Preferred: dedicated padeyes, through‑deck strongpoints or purpose‑fitted jackline terminations with backing plates—these are engineered to take the loads from a clipped crew. Design them to distribute load into the hull structure.
- Acceptable with caution: properly secured strong cleats or toe‑rail padeyes if they are through‑bolted and rated; use a dedicated, clearly marked point for harness attachment.
- Avoid: lifelines and stanchion bases as primary attachment points—these are not reliably rated for the dynamic loads that can occur during a fall overboard. Many safety guides explicitly recommend against using lifelines for clipping.
Practical note on through‑deck fittings
- If you install new padeyes, plan for backing plates and use structural fastenings—fitters often state minimum design loads in kilonewtons for padeye fittings rather than vague terms such as “strong”. If you’re chartering, ask the base where the jacklines terminate and whether those points are reinforced.
Implementing Quick‑Connect Practices
A simple routine saves seconds when it matters.
Best practices
- Clip on before leaving the cockpit. Always. Make that the crew rule. This eliminates risky mid‑deck clipping.
- Double‑clip when stationary. If you must leave one clip to step past a bulkhead or ladder, use a second hand or a buddy to keep one secure clip attached until the other is fastened.
- Keep one clip on the boat during transfers. When moving in narrow or awkward places (boarding a dinghy, short ladder transfers), keep at least one attachment point on the boat until the new attachment is secured.
- Use a twin/two‑leg tether for work that requires repeated short‑clip/unclip actions: the short leg stays clipped while the long leg is positioned for work. RORC and other offshore guidelines discuss twin tethers for heavy conditions.
Quick‑connect hardware notes
- Train everyone to operate the double‑action hook deliberately: it takes two motions (open gate, press side release or rotate) so practice until it’s second nature.
- Where possible, attach the boat end of the tether to a quick‑release ring on the padeye designed for under‑load operation; some harnesses permit releasing under load but this is specialist equipment and must be tested in controlled conditions.
Inspection Routines and Chafe Mitigation
Make inspection part of every watch handover and every turnaround at base.
Inspection techniques (daily / weekly)
- Daily: fast visual check before leaving the cockpit—look for cut fibres, heavy soiling, melted or glazed areas, or exposed core. Check the hooks: gates move freely, locking action works, and screw gates (if present) are not jammed.
- Weekly (or after heavy weather): run your hands along the entire length of webbing looking for stiffness, soft spots, broken stitches at terminations, or UV‑brittle areas; check sewn terminations and stitching for elongation or thread breakage.
- Overload indicator: many modern tethers include a coloured stitch or flag that shows if the tether has been heavily loaded—treat a triggered indicator as a reason to retire the tether.
- Replace webbing more quickly if it’s left rigged in strong sun or salt spray—replacement intervals for jacklines left rigged outdoors vary by operator; replace sooner if any signs of UV or abrasion damage appear.
Chafe mitigation strategies
- Protect high‑wear points with purpose‑made sleeves, heat‑shrink polymer covers, or engineered chafe guards stitched over the webbing.
- Route jacklines to avoid contact with sharp edges and moving gear. Where crossing is unavoidable, fit a low‑friction sacrificial pad or a plastic lip.
- Keep jacklines reasonably tensioned to avoid excessive movement in a seaway—excessive flapping increases abrasion. Do not over‑tension to the point that hardware is loaded unnecessarily.
- Stow spare jacklines off‑deck when not in use to minimise UV exposure; dry before coiling to avoid salt crystallisation and thread deterioration.
Repair and retirement
- Small frays along the edge can sometimes be heat‑sealed (for synthetic materials) or bound with protective tape as a temporary fix, but any structural stitching failure or visible core damage requires retirement.
- For tethers and harnesses: follow manufacturer retirement guidance; do not return a tether to service if the overload indicator shows activation.
On‑Board Safety Briefing for New Guests
Have a short, practised script and a hands‑on demo. Keep it under five minutes for non‑sailors—practical demonstration beats lecture.
Safety briefing essentials (scripted checklist)
- Harness and tether demo (2 minutes)
- Show how the harness fits: shoulder straps snug, chest buckle and crotch/thigh straps adjusted so the harness won’t ride up if the bladder inflates.
- Demonstrate where to clip the tether to the harness D‑ring and how to release.
- Jackline tour (1–2 minutes)
- Walk the crew along the route of the jacklines, point out where they start and end, and show the primary attachment padeyes.
- Explain: “Jacklines run inboard of the shrouds; stop before the bow and stern. Don’t clip to the lifelines.”
- Quick‑connect drill (1–2 minutes)
- Everyone clips on, walks a short segment clipped, unclips and practices double‑clipping while stationary. Emphasise: “Clip on before you leave the cockpit.”
- Dinghy transfer rule
- Explain the transfer routine: clip on in cockpit, keep one hand free to hold a rail during step‑downs, maintain a buddy eye on the transfer.
- Emergency points (30 seconds)
- Point to the MOB pole, stop/hold fast procedure, and explain who will shout and who retrieves in a man‑overboard (assign roles if chartering).
On‑board checklist (print and keep near companionway)
- Harnesses: available, adjusted, and stowed in one place.
- Tethers: 1 m (cockpit) and 2 m (foredeck) ready and labelled.
- Jacklines: visible run, terminations clear, no frayed sections.
- Quick‑connect practice completed with new guests.
- Night: reflective patches and lights checked.
Sample lines to use with guests
- “Before you step onto the side deck, clip on—don’t unclip until both feet are safely in the cockpit.”
- “If you feel unsure, stop and call me—in rough conditions we double‑clip and buddy up.”
Final word on procedure Make the briefing and the drill mandatory for every guest and repeat it when conditions change (night, heavy weather, anchoring in unfamiliar places). The habit of clipping on first and keeping one clip attached saves lives.
Ensure your crew's safety by implementing these rigging techniques today.
Frequently Asked Questions
Use flat, UV‑resistant polyester webbing for jacklines and ISO‑compliant harnesses/tethers with double‑action (self‑locking) hooks at the boat end.
Run jacklines close to the centreline, inboard of shrouds, and stop them short of the extreme bow and stern to reduce overboard risk.
Carry a 1‑metre tether for cockpit work and a 2‑metre tether for forward deck tasks; use a short‑leg or double‑tether setup for added safety offshore.
Clip tethers to reinforced padeyes, strong cleats or dedicated jackline terminations that are through‑bolted with backing plates; avoid clipping to lifelines alone.
Clip on in the cockpit before leaving it, use a double‑clip when stationary, and maintain one clip on the boat at all times during transfers.
Visually and manually check for UV fading, fiber fray, stitching failure, and the tether’s overload indicator; replace if any damage or after heavy exposure.
Fit protective sleeves at high‑wear points, route jacklines away from sharp edges and winches, and keep webbing tensioned to minimise movement.
Demonstrate harness fit, show where jacklines run, practice clipping/unclipping, and give a short checklist (clip on, clip short, keep one hand free, don’t clip to lifelines).
Written by
Sailnboat Editorial
The Sailnboat editorial desk covers yacht and boat chartering worldwide — routes, bases, seasons, boat types, paperwork and the practical costs that decide a trip. We are a charter marketplace, not a boat owner or a local agency: what we sell is judgement and support, so our guides are written to help you make a decision, not to sell you a specific boat. Every guide is checked against live operator and marina data before it goes out.
Fact-checked against live operator and marina data, and published under our editorial standards. Last reviewed: .